Disclaimer: My disclaimer from this post still applies.
1. Nausea does not disappear the first day of the second trimester. Ok, intuitively I knew this. But I have to admit, part of me was still disappointed when I woke up that first day of the second trimester and still had to pay homage to the porcelain god.
2. Once the nausea does subside, all the weight comes right back… and then some. I lost weight that first trimester over a series of weeks. I put it all back on in a matter of, what felt like, seconds. At one OB appointment during the 1st trimester, I stepped on the scale and discovered I was at the lowest weight I had ever been in my adult life. One or two appointments later, not only was I back to my pre-pregnancy weight, I had added a couple cushioning pounds. The doctor even commented after looking at my weight chart, “Oh! You’re feeling better, aren’t you?!” Why yes, yes I am.
3. The “second trimester wind” really and truly does exist. For the first few weeks of my second trimester I thought it was all a myth perpetuated by women who dealt with mere tummy aches in their first trimester. Then, I slowly started to get more energy. I didn’t feel like I needed a nap all the time. I could walk through the grocery store without wanting to sit down next to the bread and never move again. Then I could go to the gym and actually work up a sweat again, as opposed to the previous weeks when it was all I could do to take a walk around the neighborhood… which brings me to my next point.
4. It is a bad idea to push yourself really hard at the gym while pregnant. From everything I had learned about exercise and pregnancy, I knew that pregnancy should be a time for maintenance and not gains. I had also read that it is important to be very careful with your joints because everything is loose and flexible. But I couldn’t help it! It just felt so good to be able to run again! So… I ran. I ran fast. Then I felt a sudden pain in my groin. I got off the treadmill and started stretching. The pain got worse. By the time I got home, I could barely make it up the stairs and every step was excruciating. I could tell this was an anatomical injury and not something wrong with the baby. That didn’t stop me from calling Rory in a state of panic. He instructed me as best he could over the phone and said he would have a better idea when he could look at me (come to find out, I had triggered something called “symphysis pubis dysfunction”). By the time Rory got home, I literally could not walk. He carried me from room to room. Let me assure you, having to be carried around is a very humbling experience. We called the doctor and explained what was going on. She told us to wait until the next day, and if it was worse, to come in. Rolling over in bed was extremely painful, making for one very long night. In the morning, it still hurt like crazy, but it wasn’t worse. After a few agonizing days, most of the pain did go away. Take it easy when you workout- lesson learned the hard way.
5. The stomach is not the only place that will get bigger. In fact, for me, it was one of the last places to grow. All my weight went straight to my hips and thighs. A disappointing reality when you’ve envisioned having a gorgeous little baby bump.
6. It is possible to go almost the entire second trimester and not get that gorgeous baby bump. I didn’t really “pop out” until the very last couple weeks of my second trimester. For most of that time I just looked like I had been eating too much pie.
7. The baby does their own thing in there. The first time we went to the doctor to find out if we were having a boy or girl (notice the use of the word “first”), the baby was turned in a way that completely prevented the doctor from determining the gender. I had taken the advice of friends and made sure I had something sugary before the appointment, and the doctor tried and tried to get the baby to move or kick just a little bit. It was to no avail. The baby was NOT going to move, and that was all there was to it. Luckily, the second time she was in a more convenient position. Now, I don’t think I could get her to stop moving, even if I tried!
8. Feeling the baby move is so cool. The first few times I felt her move, it felt more like butterflies bumping and flying around in there than actual kicks, but it was still awesome!
9. Pregnancy hormones are a real thing. One day, Rory and I were sitting on the couch before he had to go to work. I honestly, can’t remember the details of the conversation, but I remember he said something about how I should call a friend so I wasn’t bored that night- a totally valid, non offensive suggestion. I burst into tears. For whatever illogical, irrational reason, I started crying as though he had just offended me, my honor, and my family. Luckily, I’ve only had one or two such hormonal experiences.
10. All in all, the second trimester rocks. I felt great, we knew the gender, and my excitement grew.
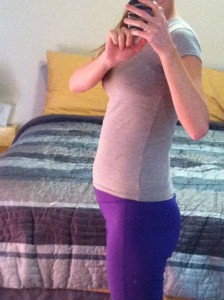 About 23 or 24 weeks. Feeling great after the gym! Please excuse the poor iphone photo quality. About 23 or 24 weeks. Feeling great after the gym! Please excuse the poor iphone photo quality.
I’ve been wanting to do a “What to Wear” feature on my blog for a while now, and am excited to finally get it going! A big thank you to Bloom Maternity for letting me use images of their gorgeous maternity clothing for this post and for providing a DISCOUNT CODE* (see the bottom of the post for 10% off Bloom Maternity apparel!) Perhaps it is a little self-serving to start this feature off with maternity information (I’m now in my third trimester, guys! CRAZY!), but here we go!
Tops:
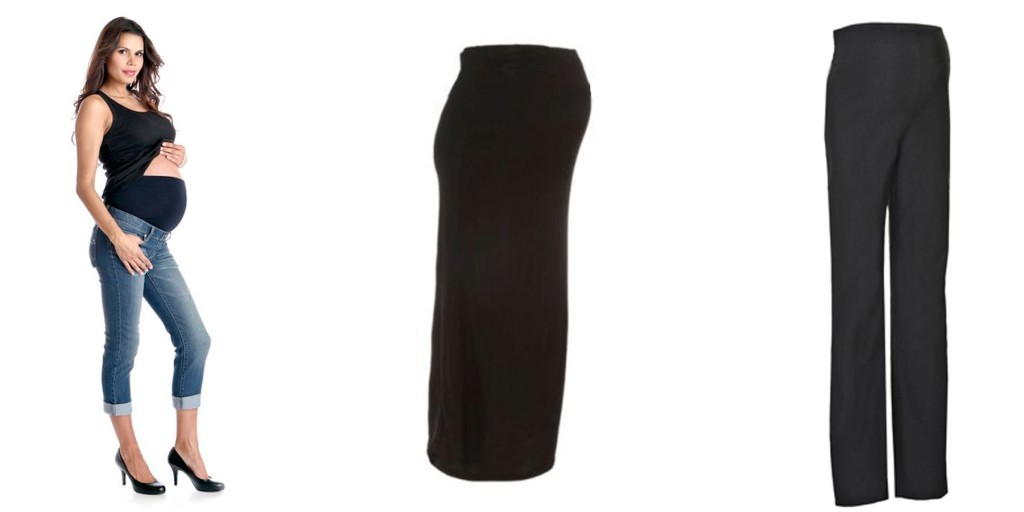
The goal of a maternity session is to show off that lovely baby bump, so I recommend a nice, fitted top that doesn’t have a busy pattern. The longer the sleeve, the more flattering for the arms. A cardigan with a fitted tee shirt is another great look that can easily be manipulated to show off your bump. Try to avoid anything voluminous or loose. While those nice, flowing peasant tops may be comfortable, those sort of tops only show off your shape when there is movement, and are not ideal for a photograph. (Hint: if you show up to a maternity session with me in a flowing top, I will probably clip it back. Don’t say I didn’t warn you!)

Bottoms:
The key with bottoms is to make sure that they create some definition under the belly as opposed to just creating a slope. Pants and jeans can either be flared (though not TOO flared) to help balance out your top half, or they can be a legging/skinny fit. If going for a skinny fit, I recommend pairing it with a longer top. If your pants happen to have a panel, we can fold it down in order to avoid having it stick out through your top. Skirts are also a great option. I recommend a long maxi skirt for maternity photo sessions. Maxi skirts hug that baby bump and drape off nicely to give you a long, lean look.
Dresses:
A dress that shows off your curves is absolutely fabulous for a maternity photo session! Look for a dress that either wraps or one that has a tie/waist below the bust. Both styles will create definition and will help you avoid the “potato sack” look. In the summer, maxi dresses are a perfect option. For a winter session, a sweater dress with leggings or tights creates a great look.

A plug for maternity photos:
I’ll be the first to admit that I haven’t felt like the most gorgeous version of myself since being pregnant, and getting my picture taken sounds about as fun as a trip to the dentist. However, I know my daughter will one day want to see what I looked like when I was pregnant with her. I know that because I wish I knew what my mom looked like when she was pregnant with me. Unfortunately, my mom never took a picture during those 9 months. When I think of the maternity photos less in terms of me and more in terms of my little girl, the concept is infinitely more appealing.
To make the session even MORE appealing, you will get your hair and makeup done professionally before the shoot. Not only will that give you the chance to enjoy some much needed pampering before the baby comes, it will also help ensure that you look like the very best version of yourself for your photos. If you are wondering when during the pregnancy you should plan on having your maternity session, the best time will probably be during the first half of the third trimester, (28-35 weeks) depending on how soon you start showing. Book both a maternity and newborn session with me to receive a discount!
Hopefully you now have a better understanding of what to wear for you session, and/or are a bit more motivated to schedule one! If you have any questions about clothing, booking a session, or just want to say hello, be sure to contact me or leave a comment!
*Enter the following discount code at checkout with Bloom Maternity: RachelMchardy
Like Bloom Maternity on Facebook: https://www.facebook.com/BloomMaternity4Moms
Check out their blog: http://bloommaternity.wordpress.com
You know how some people just have that naturally glowing, radiant skin? The kind that looks like Mother Earth just took her perma-airbrush to their faces? Yeah, I totally don’t have that kind of skin.
I have what’s called “combination skin,” meaning I have the skin of a greasy 15 year-old in some spots and the dry, flaky skin of a rattlesnake in other spots. Lucky, lucky me. As much as I would love a couple trips to the spa every couple weeks for some facials, with a baby on the way and a husband finishing up grad. school, that’s just not in the budget at the moment. So I have taken matters into my own hands and have been experimenting with some do at home facials.
Mission #1 was to get the breakout problem a bit more under control. So, the first diy facial I tried was a simple citrus and baking soda facial. I used baking soda because I know it is basic, and can help balance out the pH of the skin as well as help control blackheads.
The last time I went to the grocery store, I bought some Texas oranges that were way, way too sour. Like actually caused physical discomfort, sour! I figured that if I couldn’t eat them, I might as well put them on my face and hope that the vitamin C helps brighten my skin while the acid shrinks the pimples!
I cut the small orange in half and squeezed out the juice into a small container. Then I dumped some baking soda in the container as well to form a paste. Unfortunately, I didn’t bother with exact measurements. (In retrospect, I am thinking it’s about a 1:1 ratio and I probably did 2 tbsp of each.) The key is to end up with a mixture that can sit on your face and not drip, so if you need to add a little more baking soda- do!
Once I had a nice paste ready, I began applying it to my face using two fingers and gently rubbing in a circular motion, allowing the baking soda to exfoliate my skin. Then I waited 20 minutes before washing it off. I was nervous that this particular homemade facial might really irritate my dry skin. Although there was a little tingling, I didn’t notice much discomfort.
After I washed it off, I noticed a few things right away. First, my skin did look brighter. Second, the blackheads were reduced (not quite poof, gone but smaller). Third, and not so desirable, I noticed that the red areas on my skin were even redder. This didn’t surprise me, but I was glad I did it at night and not in the morning when I’d have to be out and about.
The next day, I noticed that the pimple on my chin was almost gone. Granted, it had been there for a while so it might just have been its time to go, but there were a couple other pimples that were threatening to surface that went down as well. The redness also decreased, thankfully.
The verdict: enough pros that I will probably do this particular diy facial once a week.
Although I often edit skin in photos, I think it’s a great idea to invest a little time before your session to get your skin looking as naturally radiant as possible. You’ll feel more confident, people won’t be shocked when they compare the skin in your photos to the real thing, and it will cut down on my editing time (a selfish plug, I know). If you think this could be a good facial for you, give it a try! Just don’t do it the night/day before the session… just in case your skin doesn’t take too kindly to it!

Ingredients for a citrus/baking soda facial:
1-2 Tbsp of orange or other citrus juice (the pure stuff, not the sugary stuff)
1-2 Tbsp baking powder
Happy Valentine’s Day! I hope you get a chance to smooch the one you love!

One of my goals this year is to focus on all the lovely moments that happen throughout the day. Write them down. Snap a picture of them. Record it on video. That way at the end of the year, I’ll be able to look back and see just how much beauty fills an ordinary day. It’s so simple… in theory.
Yesterday I had some set backs. Nothing major- just a few business plans that didn’t go my way. I admit, it got me down. Like tears-in-the-eyes down. In those down moments, it is so easy for me to think “today is a bad day.”
Later that night, Rory and I went out for ice cream. As we sat in the Sonic parking lot I realized something. None of those business plans I had were worth that moment- being with my husband, eating our half Oreo, half Reese’s Sonic Blast. And I refused to let those failed business plans take away from the beauty of that moment. There, in the parking lot, I realized today was a lovely day.

Okay, so this wasn’t my view from the parking lot or anything, but it was still a lovely day!
If you’d like me to send you this picture (I’ll email it to you- high res JPEG) to help you remember that “today was a lovely day,” send me an email: rachel@rachelmchardyphotography.com. Then, be awesome and share this post! Then be super awesome and like me on Facebook (hint, that’s where I announce cool stuff like this first!).
Ideas on what to do with it:
- Frame it
- Turn it into a magnet and stick it on your fridge or mirror
- Stick it on/in your journal
- Make it a card
- Save it to your phone and use it as a background
- Post it on Facebook/Pinterest/your blog to remind others that “today was a lovely day”
- Last but not least, ENJOY IT!
|
 About 23 or 24 weeks. Feeling great after the gym! Please excuse the poor iphone photo quality.